企業應用中,經常會遇到一些需要定時自動執行的程式來完成某些功能,比如:自動定時從第三方web service取回資料、定時對曆史資料進行清理、定時向ftp上傳業務資料...
這類程式,我習慣稱為“機器人”程式,就象機器一樣機械、高效、重複的執行某些任務。通常部署上線後,都是放在伺服器上一直開着,不允許輕易被關閉,而且最好要有一個界面,随時可以手動友善控制狀态或檢視運作情況,一旦發生異常情況,能及時通知管理者(Email或短信之類)
如果是采用WPF技術開發,以下是幾個需要注意的地方:
1、無邊框窗體(防止使用者不小心點到 右上角的關閉按鈕)
<Window x:Class="WeatherSpider.MainWindow"
        xmlns="http://schemas.microsoft.com/winfx/2006/xaml/presentation"
        xmlns:x="http://schemas.microsoft.com/winfx/2006/xaml"
         WindowStyle="None" ...>
将主窗體的WindowStyle設定成None即可
2、無邊框窗體的移動
去掉頂上的邊框後,通常為了美觀,我們需要自己在頂上放一個僞造的标題欄,類似下面這樣
<Border Grid.Row="0" MouseLeftButtonDown="TitleBarOnMouseLeftButtonDown" >
    <Grid Margin="5,5,5,0" >
        <Grid.ColumnDefinitions>
            <ColumnDefinition Width="*"></ColumnDefinition>
            <ColumnDefinition Width="Auto"></ColumnDefinition>
        </Grid.ColumnDefinitions>
        <TextBlock Foreground="GreenYellow" FontSize="16" x:Name="tbTitle">全國機場天氣-采集機器人</TextBlock>
        <TextBlock Text="最小化" Grid.Column="1" Foreground="GreenYellow" FontSize="12" VerticalAlignment="Center" TextAlignment="Right" x:Name="btnMin" Cursor="Hand" MouseLeftButtonDown="btnMin_MouseLeftButtonDown"></TextBlock>
    </Grid>
</Border>
為了實作滑鼠拖動标題欄時,窗體也能跟着拖動,需要在标題欄的對象上增加MouseLeftButtonDown事件處理(即:上面代碼Border上的MouseLeftButtonDown="TitleBarOnMouseLeftButtonDown" )
private void TitleBarOnMouseLeftButtonDown(object sender, MouseButtonEventArgs e)
{
    base.DragMove();
}
哦,原來 so easy !
3.最小化到系統托盤
Winform中的NotifyIcon控件在WPF中仍然可以繼續使用
先 using System.Windows.Forms; 添加Windows.Forms命名空間的引用
再聲明一個窗體級的變量
private readonly NotifyIcon notifyIcon;
最後在主窗體的構架函數中,加入下列這一段
notifyIcon = new NotifyIcon();
notifyIcon.BalloonTipText = Properties.Resources.AppTitle + " 正在運作!";
notifyIcon.Text = Properties.Resources.AppTitle;//指定托盤提示文字為資源中的AppTitle字元串
notifyIcon.Icon = Properties.Resources.App;//指定托盤圖示為資源中的"App"圖示
notifyIcon.Visible = false;
notifyIcon.MouseClick += notifyIcon_MouseClick;

//托盤右鍵菜單
MenuItem itemShowMainForm = new MenuItem("顯示主界面");
itemShowMainForm.Click += ShowMainWindow;
MenuItem itemExit = new MenuItem("退出");
itemExit.Click += ExitApplication;
MenuItem[] menuItems = new[] { itemShowMainForm, itemExit };
notifyIcon.ContextMenu = new ContextMenu(menuItems);
notifyIcon_MouseClick事件代碼如下:
public void Show() {
    Visibility = Visibility.Visible;
    Activate();
    notifyIcon.Visible = false;
}

 /// <summary>
 /// 托盤圖示滑鼠點選處理
 /// </summary>
 /// <param name="sender"></param>
 /// <param name="e"></param>
void notifyIcon_MouseClick(object sender, MouseEventArgs e)
{
    if (e.Button == MouseButtons.Left)
    {
        if (Visibility == Visibility.Visible)
        {
            Visibility = Visibility.Hidden;
            notifyIcon.Visible = true;
        }
        else
        {
            Show();
        }
    }
}

//顯示主界面
void ShowMainWindow(object sender, EventArgs e)
{
    Show();
}
在上面提到的第2點中,可能已經有朋友注意到了“最小化”的文本上,已經加了 MouseLeftButtonDown="btnMin_MouseLeftButtonDown"事件處理,即點選“最小化”這幾個字,可以縮小到托盤區,代碼如下:
private void btnMin_MouseLeftButtonDown(object sender, MouseButtonEventArgs e)
{
    Visibility = Visibility.Hidden;//隐藏主窗體
    notifyIcon.Visible = true;//顯示托盤圖示
    notifyIcon.ShowBalloonTip(1000);//顯示托盤圖示上的氣泡提示1秒鐘
}
4.程式退出時,主動提醒
雖然做了無邊框窗體的處理,但是如果使用者意外按了Alt+F4,甚至誤操作登出或重新開機Windows,程式還是會直接退出的,最好能給個提示,這樣管理者看到提示後,有機會取消誤操作
先給主窗體增加Closing事件處理,主窗體構造函數中,加入下面這一行
Closing += Window_Closing;
Window_Closing事件如下:
private void Window_Closing(object sender, System.ComponentModel.CancelEventArgs e)
{
    if (MessageBox.Show("确定要退出[" + Properties.Resources.AppTitle + "]嗎?",
                                      Properties.Resources.AppTitle,
                                      MessageBoxButton.YesNo,
                                      MessageBoxImage.Question,
                                      MessageBoxResult.No) == MessageBoxResult.Yes)
    {
        this.Closing -= Window_Closing;//注意:這裡要登出事件監聽,否則會連續彈出二次提示框才能退出
        notifyIcon.Visible = false;
        e.Cancel = false;
    }
    else
    {
        e.Cancel = true;
    }
}
經過上述處理後,使用者按Alt+F4時,就會提示是否退出。但這樣還不夠,如果Windows登出時,仍然會直接退出
這就需要 using Microsoft.Win32;使用Win32命名空間下的某些功能了,主窗體構造函數中,增加:
//捕獲關機事件
SystemEvents.SessionEnding += SystemEvents_SessionEnding;
處理代碼如下:
void SystemEvents_SessionEnding(object sender, SessionEndingEventArgs e)
{

    if (MessageBox.Show("[" + Properties.Resources.AppTitle + "]正在運作中,确定要退出嗎?",
                          Properties.Resources.AppTitle,
                          MessageBoxButton.YesNo,
                          MessageBoxImage.Question,
                          MessageBoxResult.No) == MessageBoxResult.Yes)
    {
        e.Cancel = false;
    }
    else {
        e.Cancel = true;
    }
}
同時在剛才的Window_Closing中,增加一行代碼:(見下面的注釋行)
private void Window_Closing(object sender, System.ComponentModel.CancelEventArgs e)
{
    if (MessageBox.Show("确定要退出[" + Properties.Resources.AppTitle + "]嗎?",
                                      Properties.Resources.AppTitle,
                                      MessageBoxButton.YesNo,
                                      MessageBoxImage.Question,
                                      MessageBoxResult.No) == MessageBoxResult.Yes)
    {
        SystemEvents.SessionEnding -= SystemEvents_SessionEnding; //取消關機事件監聽
        this.Closing -= Window_Closing;
        notifyIcon.Visible = false;
        e.Cancel = false;
    }
    else
    {
        e.Cancel = true;
    }
}
5.單執行個體運作
Winform中要實作單執行個體運作,非常容易(見 利用c#制作托盤程式,并禁止多個應用執行個體運作),但是WPF中就有點麻煩,網上搜尋了一下,有朋友已經解決了這個問題
引用using Microsoft.VisualBasic.ApplicationServices; (注:必須先添加對Microsoft.VisualBasic的程式集引用)
然後把App.xaml編譯屬性改成Page,同時修改App.xaml.cs代碼如下:
using System.Windows;
using System.Diagnostics;
using System;
using WeatherSpider.Helper;

namespace WeatherSpider
{
    /// <summary>
    /// Interaction logic for App.xaml
    /// </summary>
    public partial class App : Application
    {
        /// <summary>
        /// Application Entry Point.
        /// </summary>
        [STAThread]
        [DebuggerNonUserCode]
        public static void Main(string[] a)
        {
            SingleApp app = new SingleApp();//SingleApp類後面馬上會提到
            app.Run(a);
        }

        protected override void OnStartup(StartupEventArgs e)
        {
            base.OnStartup(e);
            MainWindow w = new MainWindow();
            w.Show();//即調用主窗體中的Show方法,顯示主窗體
        }

        public void Activate()
        {
            (MainWindow as MainWindow).Show();
        }
     }
}
再建立一個SingleApp類
using Microsoft.VisualBasic.ApplicationServices;

namespace WeatherSpider.Helper
{
    public class SingleApp : WindowsFormsApplicationBase
    {
        App a;

        public SingleApp()
        {
            this.IsSingleInstance = true;
        }

        protected override bool OnStartup(StartupEventArgs eventArgs)
        {
            a = new App();
            a.Run();
            return false;
        }

        protected override void OnStartupNextInstance(StartupNextInstanceEventArgs eventArgs)
        {
            base.OnStartupNextInstance(eventArgs);
            a.Activate();//第二個執行個體試圖“啟動”時,自動把已經運作的執行個體激活并顯示
        }
    }

}
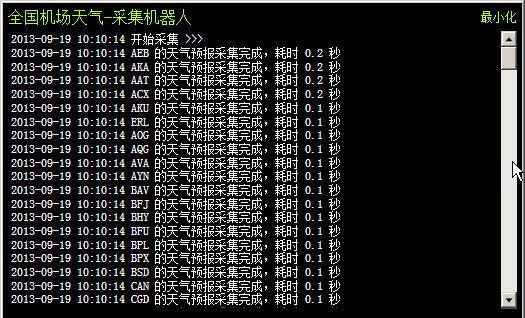
最後上圖二張:

作者:菩提樹下的楊過