一、下載下傳
Linux:CentOS 7.3 64位
Nginx:nginx-1.13.1
安裝目錄:/usr/local/
wget http://nginx.org/download/nginx-1.13.1.tar.gz 二、安裝
1、安裝Nginx依賴
(1) gcc、gcc-c++
yum install gcc
yum install gcc-c++
(2) pcre 、zilb
yum -y install pcre*
yum -y install zlib*
(3) openssl (若需要支援 https 協定)
yum -y install openssl
yum -y install openssl-devel
2、安裝Nginx
(1) 解壓安裝包
tar -z -xv -f nginx-1.13.1.tar.gz (2) 編譯
cd nginx-1.13.1
./configure --prefix=/usr/local/nginx --with-http_ssl_module --with-http_stub_status_module --with-pcre
tips:
--prefix:設定安裝路徑
--with-http_stub_status_module:支援nginx狀态查詢
--with-http_ssl_module:支援https
--with-pcre:為了支援rewrite重寫功能,必須制定pcre
(3) 安裝
make
make install
(4) 啟動
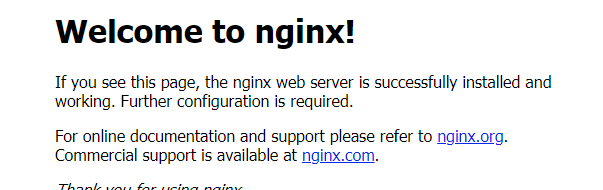
/usr/local/nginx/sbin/nginx -c /usr/local/nginx/conf/nginx.conf (5) 效果
通路 http://域名/
三、配置
Nginx 的配置内容都寫在 /usr/local/nginx/conf/nginx.conf 中,先來看看這個檔案一些配置項的含義:
#user  nobody;
#開啟的線程數,一般跟邏輯CPU核數一緻
worker_processes  1;

#定位全局錯誤日志檔案,級别以notice顯示,還有debug,info,warn,error,crit模式,debug輸出最多,crir輸出最少,根據實際環境而定
#error_log  logs/error.log;
#error_log  logs/error.log  notice;
#error_log  logs/error.log  info;

#指定程序id的存儲檔案位置
#pid        logs/nginx.pid;


events {
    #定義每個程序的最大連接配接數,受系統程序的最大打開檔案數量限制。
    worker_connections  1024;
}


http {
    include       mime.types;
    #核心子產品指令,預設設定為二進制流,也就是當檔案類型未定義時使用這種方式
    default_type  application/octet-stream;

    #log_format  main  '$remote_addr - $remote_user [$time_local] "$request" '
    #                  '$status $body_bytes_sent "$http_referer" '
    #                  '"$http_user_agent" "$http_x_forwarded_for"';

    #access_log  logs/access.log  main;

    sendfile        on;
    #開啟防止網絡阻塞
    #tcp_nopush     on;

    #開啟防止網絡阻塞
    #tcp_nodelay    on;

    #keepalive_timeout  0;
    #設定用戶端連接配接儲存活動的逾時時間
    keepalive_timeout  65;

    #設定允許用戶端請求的最大的單個檔案位元組數
    client_max_body_size    200m;

    #指定來自用戶端請求頭的headebuffer大小
    #client_header_buffer_size  32k;

    #指定連接配接請求試圖寫入緩存檔案的目錄路徑
    #client_body_temp_path /dev/shm/client_body_temp;

    #指定用戶端請求中較大的消息頭的緩存最大數量和大小,目前設定為4個32KB
    #large client_header_buffers 4 32k;


    #gzip  on;

    #配置負載均衡
    upstream tomcatServer {
        server 192.168.0.1:8680  weight=10;
        server 192.168.0.2:8680  weight=10;
    }

    server {
        #監聽端口,其中 http 是80,https 是 443
        listen       80;
        #主機域名
        server_name  localhost;
        #設定通路的語言編碼
        #charset koi8-r;
        #設定虛拟主機通路日志的存放路徑及日志的格式為main
        #access_log  logs/host.access.log  main;

        #監聽所有的 / 通路路徑,并将它轉化相應伺服器
        location / {
             proxy_pass http://tomcatServer/;
        }


        #error_page  404              /404.html;

        # redirect server error pages to the static page /50x.html
        #
        error_page   500 502 503 504  /50x.html;
        location = /50x.html {
            root   html;
        }

        # proxy the PHP scripts to Apache listening on 127.0.0.1:80
        #
        #location ~ \.php$ {
        #    proxy_pass   http://127.0.0.1;
        #}

        # pass the PHP scripts to FastCGI server listening on 127.0.0.1:9000
        #
        #location ~ \.php$ {
        #    root           html;
        #    fastcgi_pass   127.0.0.1:9000;
        #    fastcgi_index  index.php;
        #    fastcgi_param  SCRIPT_FILENAME  /scripts$fastcgi_script_name;
        #    include        fastcgi_params;
        #}

        # deny access to .htaccess files, if Apache's document root
        # concurs with nginx's one
        #
        #location ~ /\.ht {
        #    deny  all;
        #}
    }


    # another virtual host using mix of IP-, name-, and port-based configuration
    #
    #server {
    #    listen       8000;
    #    listen       somename:8080;
    #    server_name  somename  alias  another.alias;

    #    location / {
    #        root   html;
    #        index  index.html index.htm;
    #    }
    #}


    # HTTPS server
    #
    server {
        #監聽https請求
        listen       443 ssl;
        #主機域名
        server_name  api.gogo.cn;
        #公鑰,他會被發送到連接配接伺服器的每個用戶端
        ssl_certificate      /usr/local/cert/lxcx.pem;
        #私鑰,是用來解密的
        ssl_certificate_key  /usr/local/cert/lxcx.key;

        #緩存在所有工作程序之間共享,1MB可以存儲4000個會話
        ssl_session_cache    shared:SSL:1m;
        #會話逾時時間
        ssl_session_timeout  30m;

        #Nginx 隻允許使用 TLS 協定
        #指令用于啟動特定的加密協定
        ssl_protocols TLSv1 TLSv1.1 TLSv1.2;
        #選擇加密套件
        ssl_ciphers HIGH:!aNULL:!MD5:!EXPORT56:!EXP;
        #設定協商加密算法時,優先使用我們服務端的加密套件,而不是用戶端浏覽器的加密套件
        ssl_prefer_server_ciphers  on;

        proxy_connect_timeout 500;
        proxy_send_timeout 500;
        proxy_read_timeout 500;
        client_max_body_size 200m;
        location / {
           # root   html;
           # index  index.html index.htm;
           proxy_pass http://172.27.0.11:8680/;
        }
# 配置 wss 通路
        location /socket {
             proxy_pass http://127.0.0.1:/9999;
             proxy_http_version 1.1;
             proxy_set_header Upgrade $http_upgrade;
            proxy_set_header Connection "upgrade";
         }
} server {
listen 443 ssl;
server_name admin.gogo.cn;
ssl_certificate /usr/local/cert/lxcx.pem;
ssl_certificate_key /usr/local/cert/lxcx.key;
ssl_session_cache shared:SSL:1m;
ssl_session_timeout 5m;
ssl_ciphers HIGH:!aNULL:!MD5;
ssl_prefer_server_ciphers on;
location / {
#root html;
# index index.html index.htm;
proxy_pass http://172.27.0.11:8380/;
proxy_connect_timeout 500;
proxy_send_timeout 500;
proxy_read_timeout 500;
client_max_body_size 200m;
}
}
} 1、配置負載均衡
如上,在檔案中配置以下内容,這裡用的是 指定輪詢幾率 的權重配置設定方式,指定 兩台伺服器的通路幾率。這裡配置的 1:1 的通路幾率,可以根據伺服器的硬體條件配置相應的比例。這種配置有個缺陷就是通路請求 随機的在兩台伺服器間跳轉,還需要解決不同伺服器間session共享問題。
upstream tomcatServer {
        server 192.168.0.1:8680  weight=10;
        server 192.168.0.2:8680  weight=10;
   }
除了這種方式外,還有 ip_hash 方式。每個請求按通路 ip 的 hash 結果配置設定,這樣每個訪客固定通路一個後端伺服器,可解決session的問題:
upstream tomcatServer {
        ip_hash;
        server 192.168.0.1:8680;
        server 192.168.0.2:8680;
  }
還有一種,按後端伺服器的響應時間來配置設定請求,響應時間短的優先配置設定:
upstream tomcatServer {
       server 192.168.0.1:8680;
       server 192.168.0.2:8680;
       fair;
}
接下來,我們就要把通路請求 映射到負載均衡上:
location /{
          proxy_pass http://tomcatServer/;
        }
2、重新開機服務
(1) 驗證配置檔案是否正确
進入nginx安裝目錄sbin下,輸入指令./nginx -t

(2) 重新開機服務
進入nginx可執行目錄sbin下,輸入指令./nginx -s reload 即可
四、Docker 安裝 Nginx
https://www.cnblogs.com/ghl1024/p/9022890.html