window平台Redis安裝
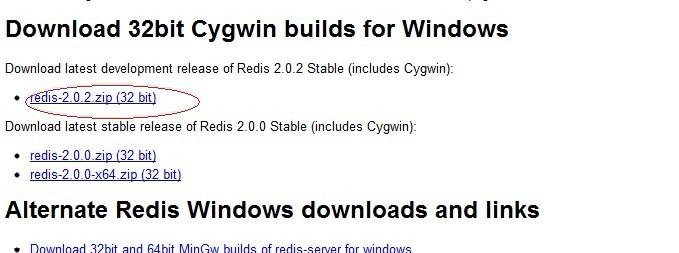
我選擇的redis為最新版的安裝檔案,見下圖:
Redis安裝檔案解壓後,有以下幾個檔案。見下圖

redis-server.exe:服務程式
redis-check-dump.exe:本地資料庫檢查
redis-check-aof.exe:更新日志檢查
redis-benchmark.exe:性能測試,用以模拟同時由N個用戶端發送M個 SETs/GETs 查詢 (類似于 Apache 的ab 工具).
在解壓好redis的安裝檔案到E:\根目錄後,還需要在redis根目錄增加一個redis的配置檔案redis.conf,檔案具體内容附件中有,不過這裡我仍然把配置檔案的内容貼上來:
配置檔案
# Redis configuration file example
# By default Redis does not run as a daemon. Use 'yes' if you need it.
# Note that Redis will write a pid file in /var/run/redis.pid when daemonized.
daemonize no
# When run as a daemon, Redis write a pid file in /var/run/redis.pid by default.
# You can specify a custom pid file location here.
pidfile /var/run/redis.pid
# Accept connections on the specified port, default is 6379
port 6379
# If you want you can bind a single interface, if the bind option is not
# specified all the interfaces will listen for connections.
#
# bind 127.0.0.1
# Close the connection after a client is idle for N seconds (0 to disable)
timeout 300
# Set server verbosity to 'debug'
# it can be one of:
# debug (a lot of information, useful for development/testing)
# notice (moderately verbose, what you want in production probably)
# warning (only very important / critical messages are logged)
loglevel debug
# Specify the log file name. Also 'stdout' can be used to force
# the demon to log on the standard output. Note that if you use standard
# output for logging but daemonize, logs will be sent to /dev/null
logfile stdout
# Set the number of databases. The default database is DB 0, you can select
# a different one on a per-connection basis using SELECT <dbid> where
# dbid is a number between 0 and 'databases'-1
databases 16
################################ SNAPSHOTTING #################################
# Save the DB on disk:
# save <seconds> <changes>
# Will save the DB if both the given number of seconds and the given
# number of write operations against the DB occurred.
# In the example below the behaviour will be to save:
# after 900 sec (15 min) if at least 1 key changed
# after 300 sec (5 min) if at least 10 keys changed
# after 60 sec if at least 10000 keys changed
save 900 1
save 300 10
save 60 10000
# Compress string objects using LZF when dump .rdb databases?
# For default that's set to 'yes' as it's almost always a win.
# If you want to save some CPU in the saving child set it to 'no' but
# the dataset will likely be bigger if you have compressible values or keys.
rdbcompression yes
# The filename where to dump the DB
dbfilename dump.rdb
# For default save/load DB in/from the working directory
# Note that you must specify a directory not a file name.
dir ./
################################# REPLICATION #################################
# Master-Slave replication. Use slaveof to make a Redis instance a copy of
# another Redis server. Note that the configuration is local to the slave
# so for example it is possible to configure the slave to save the DB with a
# different interval, or to listen to another port, and so on.
# slaveof <masterip> <masterport>
# If the master is password protected (using the "requirepass" configuration
# directive below) it is possible to tell the slave to authenticate before
# starting the replication synchronization process, otherwise the master will
# refuse the slave request.
# masterauth <master-password>
################################## SECURITY ###################################
# Require clients to issue AUTH <PASSWORD> before processing any other
# commands. This might be useful in environments in which you do not trust
# others with access to the host running redis-server.
# This should stay commented out for backward compatibility and because most
# people do not need auth (e.g. they run their own servers).
# requirepass foobared
################################### LIMITS ####################################
# Set the max number of connected clients at the same time. By default there
# is no limit, and it's up to the number of file descriptors the Redis process
# is able to open. The special value '0' means no limts.
# Once the limit is reached Redis will close all the new connections sending
# an error 'max number of clients reached'.
# maxclients 128
# Don't use more memory than the specified amount of bytes.
# maxmemory <bytes>
appendonly no
appendfsync always
glueoutputbuf yes
将附件中的redis_conf.rar解壓下來放到redis的根目錄中即可。到此,redis的安裝已經完畢。下面開始使用redis資料庫。
啟動redis:
輸入指令:redis-server.exe redis.conf
啟動後如下圖所示:
啟動cmd視窗要一直開着,關閉後則Redis服務關閉。
這時服務開啟着,另外開一個視窗進行,設定用戶端:
輸入指令:redis-cli.exe -h 202.117.16.133 -p 6379
輸入後如下圖所示:
上面的IP寫自己的哦:
php擴充Redis功能
1 首先,檢視所用php編譯版本V6/V9 在phpinfo()中檢視
3 将下載下傳的php_redis.dll放在php擴充目錄中(ext),并修改配置檔案php.ini
添加 擴充的時候一定要
extension=php_igbinary.dll
extension=php_redis.dll
這個順序
否則重新開機Apache的時候會出現,PHP startup 錯誤
4 重新啟動服務,檢視phpinfo(),下面表示成功;
5 用PHP測試
Php代碼
$redis = new Redis();
$redis->connect("192.168.138.2","6379"); //php用戶端設定的ip及端口
//存儲一個 值
$redis->set("say","Hello World");
echo $redis->get("say"); //應輸出Hello World
//存儲多個值
$array = array('first_key'=>'first_val',
'second_key'=>'second_val',
'third_key'=>'third_val');
$array_get = array('first_key','second_key','third_key');
$redis->mset($array);
var_dump($redis->mget($array_get));
如何聯系我:【萬裡虎】www.bravetiger.cn
【QQ】3396726884 (咨詢問題100元起,幫助解決問題500元起)
【部落格】http://www.cnblogs.com/kenshinobiy/