Ubuntu version : ubuntu-11.04-server-i386
安裝好ubuntu後,切換成root登陸,免輸sudo..
先更新一下: apt-get update && upgarde
看下cacti版本: apt-cache show cacti
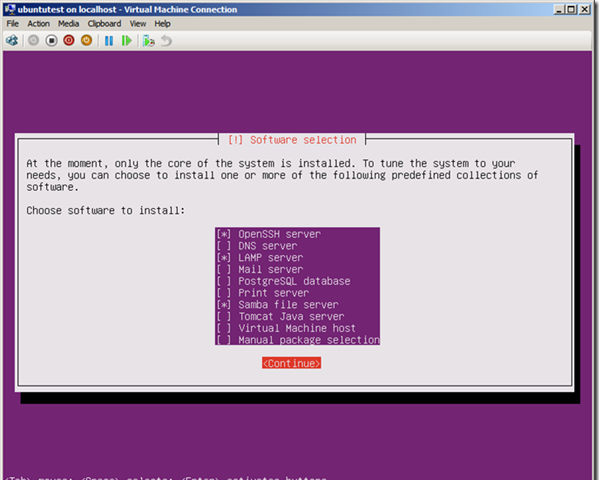
輸入tasksel,安裝下 LAMP 和 SSH.
這裡給mysql的root賬号輸入密碼,

一. 安裝Cacti
開始安裝cacti :apt-get install cacti snmpd
無視下面的警告,直接OK:
http server 選中 apache2
下面選yes,此處用來配置cacti資料庫
輸入mysql的root密碼,
mysql建立賬号給cacti使用,這裡需要輸入密碼,預設輸入 cactiuser
到這裡cacti安裝OK.
Cacti 的安裝目錄位于 /var/share/cacti
檢視server IP 位址:ifconfig ,
在IE 中輸入 : http://server ip/cacti ,進入cacti配置界面:
這裡應該全部是OK:
輸入初始賬号\密碼: admin\ admin
點選 graphs标簽,如果可以看到localhost 的圖形資料 ,則表示cacti安裝成功(如果看到圖是XX,等10分鐘重新整理再看)。
安裝spine (可選):
cacti預設使用cmd.php輪詢抓取資料,不過效率較低,換成spine可提高效率。
安裝指令: apt-get install cacti-spine
安裝OK後把poller type 改成spine ,觀察graphs裡localhost圖形,如果沒有問題,則更換poller成功,如果spine有問題,可以改回cmd.php。
二.擴充cacti 插件架構Plugin Architecture
Cacti預設不可以添加插件,需要擴充架構後才可以使用。
需要下載下傳對應cacti版本的PA,此處cacti為0.8.7g,PA對應版本為V2.8
1.進入root賬戶home目錄 : cd
2.建立一個檔案夾: mkdir share, 進入share : cd share
3.下載下傳需要用的Plugin Architecture:
wget http://mirror.cactiusers.org/downloads/plugins/cacti-plugin-0.8.7g-PA-v2.8.tar.gz
一些常用插件的位址,可以一并下載下傳:
Monitor : http://mirror.cactiusers.org/downloads/plugins/monitor-0.8.2.tar.gz
Weathermap: http://www.network-weathermap.com/files/php-weathermap-0.97a.zip
Discover:http://cactiusers.org/downloads/discovery.tar.gz
Syslog:http://cactiusers.org/downloads/syslog.tar.gz
NPC : http://www.scsorlando.com/files/npc2.0.4.tar
4.解壓縮cacti-plugin-0.8.7g-PA-v2.8.tar.gz : tar xzf cacti-plugin-0.8.7g-PA-v2.8.tar.gz
5.進入解壓後目錄,将此檔案夾中所有檔案copy至 /usr/share/cacti/site
指令 : cp -R ./* /usr/share/cacti/site
6.進入cacti目錄,cd /usr/share/cacti/site
7.運作如下指令 pach -p1 –N < cacti-plugin-0.8.7g-PA-v2.8.diff
下面為執行結果,可以看到有FAILED 出現,提示failed的檔案重新覆寫下,将PA 解壓出的檔案夾files-0.8.7g 中
的<b>file data_sources.php</b>覆寫site下的<b>file data_sources.php</b>檔案。
root@monitorsz:/usr/share/cacti/site# patch -p1 -N &lt; cacti-plugin-0.8.7g-PA-v2.8.diff
patching file auth_changepassword.php
patching file auth_login.php
patching file data_sources.php
Hunk #6 FAILED at 1323.
<b>1 out of 6 hunks FAILED -- saving rejects to file data_sources.php.rej</b>
patching file graph_p_w_picpath.php
patching file graph.php
patching file graphs_new.php
patching file graphs.php
patching file host.php
patching file p_w_picpaths/disable_icon.png
patching file p_w_picpaths/enable_icon_disabled.png
patching file p_w_picpaths/enable_icon.png
patching file p_w_picpaths/install_icon_disabled.png
patching file p_w_picpaths/install_icon.png
patching file p_w_picpaths/uninstall_icon.gif
patching file p_w_picpaths/view_none.gif
patching file include/auth.php
patching file include/bottom_footer.php
patching file include/config.php
Hunk #1 succeeded at 26 with fuzz 2 (offset -4 lines).
patching file include/global_arrays.php
patching file include/global_constants.php
patching file include/global_form.php
patching file include/global.php
Hunk #2 succeeded at 195 with fuzz 2.
patching file include/global_settings.php
Hunk #1 succeeded at 1191 (offset 1 line).
patching file include/plugins.php
patching file include/top_graph_header.php
patching file include/top_header.php
patching file index.php
patching file lib/api_device.php
patching file lib/auth.php
patching file lib/functions.php
patching file lib/html_form.php
patching file lib/html.php
patching file lib/plugins.php
patching file lib/poller.php
patching file lib/rrd.php
patching file lib/variables.php
patching file plugins/index.php
patching file plugins.php
patching file poller.php
patching file user_admin.php
patching file utilities.php
8.執行覆寫:
<b>root@monitorsz:/usr/share/cacti/site/files-0.8.7g#</b> cp data_sources.php ../
9.覆寫後修改下config.php :
<b>root@monitorsz:/usr/share/cacti/site#</b> vi /usr/share/cacti/site/include/config.php
找到 $url_path = “/”修改如下:
9.cd到site目錄,進入mysql指令行: mysql -u root -p ,回車後輸入mysql密碼,進入後
檢視資料庫: show database;
進入cacti資料庫: use cacti
導入pa.sql : source pa.sql
Exit退出
10.重新開機apache服務 :
root@monitorsz:/usr/share/cacti/site# /etc/init.d/apache2 restart
11.登陸cacti,進入Console -> User Management ,選擇admin賬戶,在下面選中Plugin Management ,點選 save。
12.左側出現 plugin management , 則PA安裝OK:
三,添加插件
一.添加monitor插件
1.進入插件的下載下傳目錄 /root/share, 解壓monitor打封包件
root@monitorsz:~# cd share
root@monitorsz:~/share# tar xzf monitor-0.8.2.tar.gz
解壓後得到monitor檔案夾
2.将monitor檔案夾copy到../cacti/site/plugins 下:
root@monitorsz:~/share# cp -R monitor /usr/share/cacti/site/plugins
3. 點選<b>Plugin Management </b>,可以看到添加的monitor插件了。點選actions的箭頭啟用。
4. Console -&gt; User Management ,選擇admin賬戶,在下面選中View Monitoring 。
5.出現monitor标簽頁,插件安裝完成。