在上一篇文章中使用了SpringBoot整合Swagger2,搭建Restful API線上文檔( 連結 )。但是有大佬開發出了功能更加強大的線上文檔架構——Swagger-Bootstrap-UI,現在已經更名為Knife4j,因為僅僅一個Swagger-Bootstrap-UI皮膚已經不能滿足開發者的需求,需要增加更多的服務端代碼來滿足開發者的需求,是以更改後的Knife4j不僅僅将前身的Ui皮膚通過Vue技術棧進行了重寫,也增加了更多個性化的特性增強功能,基于springfox項目以及OpenAPI的規範,當然它也是基于Swagger的。Knife4j目前主要支援以Java開發為主,并且是依賴于大環境下使用的Spring MVC、Spring Boot、Spring Cloud架構。當然,Knife4j也提供了離線版本,隻要是符合Swagger的OpenAPI版本的規範JSON,都可以通過簡單的配置進行适配,離線版本是适合于任何語言中使用Swagger的,非常的靈活、友善。
該開源項目GitHub位址:https://github.com/xiaoymin/Swagger-Bootstrap-UI
該開源項目中文文檔位址(knife4j):https://doc.xiaominfo.com
下面使用SpringBoot來整合Knife4j,如下所示:
01
02
03
04
05
<dependency>
<groupId>com.github.xiaoymin</groupId>
<artifactId>knife4j-spring-boot-starter</artifactId>
<version>2.0.7</version>
</dependency>
基于之前例子的代碼:
06
07
08
09
10
11
12
13
14
15
16
17
18
19
20
21
22
23
24
25
26
27
28
29
30
@Configuration
@EnableSwagger2WebMvc
public class SwaggerConfig {
@Bean
public Docket docket(){
return new Docket(DocumentationType.SWAGGER_2)
.apiInfo(apiInfo())
.select()
.apis(RequestHandlerSelectors.basePackage("com.thr.controller"))
.paths(PathSelectors.any())
.build();
}
private ApiInfo apiInfo(){
return new ApiInfoBuilder()
// 頁面标題
.title("标題:springboot整合Knife4j項目API文檔")
// 項目描述
.description("描述:springboot整合Knife4j項目API文檔")
// 服務條款網址
.termsOfServiceUrl("https://www.cnblogs.com/tanghaorong")
// 作者資訊
.contact(new Contact("唐浩榮","www.tanghaorong.com","[email protected]"))
// 許可證
.license("Apache 3.0")
// 版本号
.version("v1.0")
}
注意:Swagger的注解同樣适用于Knife4j,因為它本來就是在Swagger的基礎上來設計這個架構的。
31
32
33
34
35
36
37
38
39
40
41
42
43
44
45
46
47
48
49
50
51
52
53
54
55
56
57
58
59
60
61
62
63
64
65
66
67
68
69
70
71
72
73
74
75
76
77
78
package com.thr.controller;
import com.thr.entity.User;
import com.thr.service.UserService;
import io.swagger.annotations.Api;
import io.swagger.annotations.ApiOperation;
import org.springframework.beans.factory.annotation.Autowired;
import org.springframework.web.bind.annotation.*;
import java.util.List;
@Api(value = "使用者",tags = "使用者資訊子產品")
@RestController
@RequestMapping(value = "/user")
public class UserController {
@Autowired
private UserService userService;
/**
* 查詢所有使用者資訊
* @return
*/
@GetMapping(value = "/findAll")
@ApiOperation(value = "查詢所有使用者資訊", notes = "擷取所有使用者資訊")
public List<User> findAll(){
List<User> userList = userService.findAll();
return userList;
* 根據id查詢使用者資訊
* @param id
@GetMapping(value = "/findUserById/{id}")
@ApiOperation(value = "根據id查詢使用者資訊", notes = "根據id擷取使用者資訊")
public User findUserById(@PathVariable(value = "id") Integer id){
return userService.findUserById(id);
* 添加使用者資訊
* @param user
@PostMapping(value = "/addUser")
@ApiOperation(value = "添加使用者資訊")
public void addUser(User user){
user.setUsername("John");
user.setPassword("123456");
user.setAge(22);
user.setAddress("中國重慶");
userService.addUser(user);
* 修改使用者資訊
@PutMapping(value = "/updateUserById")
@ApiOperation(value = "修改使用者資訊")
public void updateUserById(User user){
user.setId(3L);
user.setUsername("Marry");
user.setAge(20);
user.setAddress("中國湖南");
userService.updateUserById(user);
* 删除使用者資訊
@DeleteMapping(value = "/deleteUserById/{id}")
@ApiOperation(value = "删除使用者資訊")
public void deleteUserById(@PathVariable(value = "id") Integer id){
System.out.println("Delete請求...");
userService.deleteUserById(id);
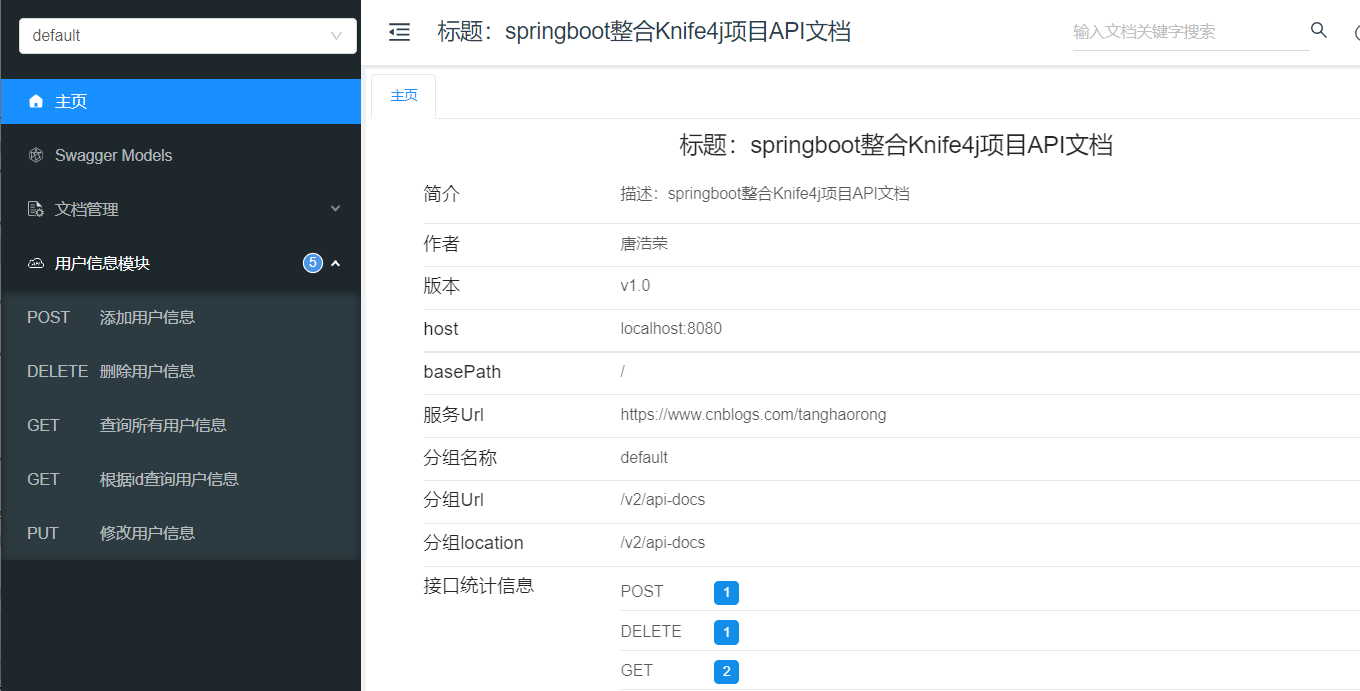
啟動項目,如果沒有報錯,然後通路位址:http://localhost:{自己設定的端口}/doc.html 即可。我的位址為:http://localhost:8080/doc.html#/home 效果圖,如下:
測試接口(這裡就測試一個查詢所有使用者資訊),效果圖如下:

可以發現使用Knife4j的調試很像PostMan來測試接口。