如同Flash一樣,WPF的亮點之一也在于其擅于表現平滑的動畫效果,但以移動動畫來說,僅憑簡單的起始位置、目标位置,所産生的動畫仍會非常生硬,這種動畫忽略了移動開始時的加速過程與移動結束時的減速過程。
WPF在關鍵幀動畫中提供了樣條内插(Spline)型的關鍵幀,用以控制變化的速率曲線,但這東西實在有些複雜,且不夠形象化,我研究很久也沒明白如何實作“緩入——緩出”的效果,随後我從一本經典牛X卻鮮有人知的過時的FlashMX教程中提取了一個緩動函數,我們将用這個函數來較真實地模拟電梯的升降行為。
至于那本牛X的書,我以後會為大家介紹,我個人認為,那本書應當作為平面動畫程式設計的必修經典,而它卻被粗爛地印刷,并一直擺在書店裡不引人注目的位置。
進入正題:
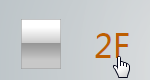
首先在界面設計器中添加一個 Rectangle ,用以代表直升電梯,然後添加4個 RadioButton 代表幾個樓層的呼叫按鈕。
稍加美化,即為下圖所示:

RadioButton 的樣式直接用來當電梯按鈕,略顯生硬,我們用下面的代碼來美化一下它:
Code
<Style TargetType="RadioButton">
<Setter Property="Foreground" Value="#ADB7BD"/>
<Setter Property="FontSize" Value="32"/>
<Setter Property="Cursor" Value="Hand"/>
<Setter Property="Template">
<Setter.Value>
<ControlTemplate TargetType="RadioButton">
<ContentPresenter/>
<ControlTemplate.Triggers>
<Trigger Property="IsChecked" Value="True">
<Trigger.EnterActions>
<BeginStoryboard>
<Storyboard>
<ColorAnimation To="#BD5E00" Duration="0:0:0.3" BeginTime="0:0:0.1" Storyboard.TargetProperty="(Button.Foreground).(SolidColorBrush.Color)"/>
</Storyboard>
</BeginStoryboard>
</Trigger.EnterActions>
<Trigger.ExitActions>
<ColorAnimation Duration="0:0:0.2" BeginTime="0:0:0.2" Storyboard.TargetProperty="(Button.Foreground).(SolidColorBrush.Color)"/>
</Trigger.ExitActions>
</Trigger>
</ControlTemplate.Triggers>
</ControlTemplate>
</Setter.Value>
</Setter>
</Style>
現在就比較帥了:
接下來為所有 RadioButton 添加統一的事件處理函數:
至此界面部分的全部代碼如下,需要注意的是,所有元素都需要手動調整一下它們在Grid中的對齊方位,将其設為 Left 和 Top。要知道,設計器會在你拖動它們的時候為其胡亂改變對其方位,這會使你的元素沒有統一的定位标準,導緻幾乎沒法用代碼統一操控它們的位置。
<Window x:Class="緩動動畫.Window1"
xmlns="http://schemas.microsoft.com/winfx/2006/xaml/presentation"
xmlns:x="http://schemas.microsoft.com/winfx/2006/xaml"
Title="Window1" Height="398" Width="381" x:Name="window" Background="{StaticResource back}" Loaded="window_Loaded">
<Window.Resources>
</Window.Resources>
<Grid>
<Rectangle Fill="{StaticResource box}" Margin="45,265,0,0" Name="rectangle1" HorizontalAlignment="Left" Width="50" Height="50" VerticalAlignment="Top" />
<RadioButton Checked="RadioButton_Checked" HorizontalAlignment="Left" Margin="123,205,0,0" VerticalAlignment="Top">1F</RadioButton>
<RadioButton Checked="RadioButton_Checked" HorizontalAlignment="Left" Margin="123,125,0,0" VerticalAlignment="Top">2F</RadioButton>
<RadioButton Checked="RadioButton_Checked" HorizontalAlignment="Left" Margin="123,45,0,0" VerticalAlignment="Top">3F</RadioButton>
<RadioButton Checked="RadioButton_Checked" HorizontalAlignment="Left" Margin="123,285,0,0" VerticalAlignment="Top" IsChecked="True">B1</RadioButton>
</Grid>
</Window>
在背景書寫事件處理函數代碼:
請不要驚訝我使用中文命名函數,假如你看過我自己寫的程式的源代碼,你就會對此保持沉默。
這就是傳說中的中文函數“開始升降”:
在這個函數中,我們建立了一個 Thickness 的關鍵幀動畫,Thickness 通常用來代表一個元素的上下左右4邊,比如 Border 四個邊的粗細就是用 Thickness 描述的,而這裡的 Margin 屬性也是 Thickness 類型。
一些要點我寫在了圖裡,這裡就不累述了。
“緩動計算”,是的,又一個神奇的中文函數,你可以在下面完整的源碼中看看它是如何運算的,至少我是對它的内容毫無興趣。
using System;
using System.Collections.Generic;
using System.Linq;
using System.Text;
using System.Windows;
using System.Windows.Controls;
using System.Windows.Data;
using System.Windows.Documents;
using System.Windows.Input;
using System.Windows.Media;
using System.Windows.Media.Imaging;
using System.Windows.Navigation;
using System.Windows.Shapes;
using System.Windows.Media.Animation;
namespace 緩動動畫
{
/**//// <summary>
/// Window1.xaml 的互動邏輯
/// </summary>
public partial class Window1 : Window
public Window1()
InitializeComponent();
}
private void window_Loaded(object sender, RoutedEventArgs e)
Storyboard s = new Storyboard();
public double 緩動計算(TimeSpan 總時間, TimeSpan 現在時間, double 初始值, double 變動量)
var t = 現在時間.TotalSeconds /( 總時間.TotalSeconds / 2);
if (t < 1) return (變動量 / 2 * Math.Pow(t, 5) + 初始值);
return (變動量 / 2 * (Math.Pow(t - 2, 5) + 2) + 初始值);
private void RadioButton_Checked(object sender, RoutedEventArgs e)
開始升降((sender as RadioButton).Margin.Top - 5);
public void 開始升降(double 目标高度)
ThicknessAnimationUsingKeyFrames d = new ThicknessAnimationUsingKeyFrames();
d.Duration = new Duration(TimeSpan.FromSeconds(Math.Abs((目标高度-rectangle1.Margin.Top)/80)));
for (int i = 0; i < 100; i++)
var t = new Thickness();
t.Left = rectangle1.Margin.Left;
t.Right = rectangle1.Margin.Right;
t.Bottom = rectangle1.Margin.Bottom;
t.Top=緩動計算(d.Duration.TimeSpan, TimeSpan.FromSeconds(d.Duration.TimeSpan.TotalSeconds / 100 * i), rectangle1.Margin.Top, 目标高度-rectangle1.Margin.Top);
d.KeyFrames.Add(new LinearThicknessKeyFrame(t, KeyTime.FromTimeSpan(TimeSpan.FromSeconds(d.Duration.TimeSpan.TotalSeconds / 100 * i))));
}
s.Children.Add(d);
Storyboard.SetTargetName(d, rectangle1.Name);
Storyboard.SetTargetProperty(d, new PropertyPath(Rectangle.MarginProperty));
s.Begin(rectangle1);
}
}
現在編譯運作吧,随便點選一個樓層,你将會看到電梯平緩的起步,然後平緩的停靠在你所選的樓層上。
當然,即使是這樣具有緩動效果的電梯,乘客也是很難生還的,但至少會比生硬的上飛下墜要好很多啦。
<a href="http://files.cnblogs.com/SkyD/WPF_ANI_1.rar">源代碼下載下傳</a>