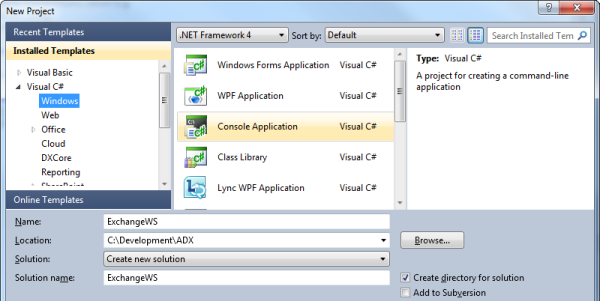
Let’s jump straight into some code by creating a new console application in Visual Studio 2010:
Before you can perform any task or run any queries against Exchange Online, you need to connect to the Exchange Online service. To do this you use the ExchangeService object.
Although the AutodiscoverUrl method has a constructor that only takes the user’s e-mail address; it will always throw an exception if the validateRedirectionUrlCallback parameter is not specified. The RedirectionUrlValidationCallback method should verify that the redirection address is valid and as a best practise, should never return true unconditionally.
With the serviced code in place, we can now create a contact with the following code:
The code will seem familiar if you worked with the Outlook Object model before. However, there are a number of differences: in the first part of the method, we set the standard Exchange properties. We then add 2 e-mail addresses to the contact; each e-mail address can have a descriptive name.
Next, an image is added to the contact as a file attachment. Setting the IsContactPhoto property to true will set the attached file as the contact’s picture. Finally, we add an extended property to the contact. A GUID is declared as the propertySetId, this only needs to be declared once and should be reused when accessing the extended property. You can define one property set identifier and use it for all the extended properties that get read or written to throughout your application.
When you run this code you should see the new contact in the Outlook Web app:

To search for a contact in Exchange Online use the following code:
In the above code, we created a new FindItemResults collection and set it equal to the return value of the services’ FindItems method. The FindItems method accepts three parameters:
the first is an enumeration value specifying which folder to search;
the second is a new instance of a SearchFilter object, where we specify on what criteria we want to search; and
lastly we pass in a new instance of an ItemView object where we set the number of records to return. We then loop through the foundItems collection and print the contact details.
You can also search for an item based on the values in an extended property:
The above code is similar to searching for a contact by name except that we first declare a reference to the extended property we’ve created earlier. You’ll notice we’re reusing the Property Set Id which was declared earlier. We then pass the clientIdPropertyDefinition as a parameter for the SearchFilter. The result is a list of all contacts whose ClientId extended property has a value of "SMITHINC"
Update the contact with the following code:
The code above first searches for a contact by e-mail address, if the contact is found we set the JobTitleproperty and call the Update method on the Contact object. The Update method accepts an enumeration parameter ConflictResolutionMode. Possible values for the parameter are:
ConflictResolution.AlwaysOverwrite – Any local property changes will overwrite any server-side changes.
ConflictResolution.AutoResolve – Unless the server-side copy is more recent than the local copy, its values will be overwritten by any local property changes.
ConflictResolution.NeverOverwrite – All local property changes are discarded.
If you compiled the code and ran it again, you would be able to see that John Smith’s Job Title has changed.
Creating and sending an e-mail is also similar to the Outlook object model:
In the code above, we created a new e-mail message and added an EmailAddress object to its ToRecipientscollection. Adding an attachment is done in a similar fashion as with the contact previously. When you want to send the e-mail you have a choice between two methods on the EmailMessage object: Send orSendAndSaveCopy. The SendAndSaveCopy method sends the e-mail and saves a copy of it to the Sent Items folder. The Send method sends the e-mail and does not store a copy of it.
Once your e-mail is sent, you should see it in your Office 365 Outlook Inbox.
Finding email is similar to searching for contacts:
The only difference between this code and searching for contacts is the WellKnowFolderName and theSearchFilter‘s parameter.
To create an appointment in the default calendar use the following code:
This code creates an appointment in the default calendar and sends a meeting request to the logged-in user. The Save method accepts the SendInvitationsMode enumeration as parameter and possible values for this are:
SendInvitationsMode.SendOnlyToAll – Sends meeting invitations to all attendees, but does not save a copy of the meeting invitation in the organizer’s Sent Items folder.
SendInvitationsMode.SendToAllAndSaveCopy – Will send the meeting invitation to all attendees and save a copy of it in the organizer’s Sent Items folder.
SendInvitationsMode.SendToNone – Will not send any meeting invitations.
Once created you should see the meeting in your Office 365 Outlook Calendar.
To find any appointments for today and tomorrow you can use the following code:
The code is similar to finding e-mails or contacts, except the FindItemsResults collection contains anAppointment object and we used the FindAppointments method of the ExchangeService object to find the appointments. The filter is applied using a CalendarView object.
Creating folders in Exchange online can easily be done using the code below:
You can create a folder by declaring a new Folder object and setting its DisplayName property. The Savemethods required the parent folder to be specified, you can pass in a WellKnownFolderName enumeration value or an existing folders’ Id.
You will notice two new folders in your Office 365 Outlook:
To list the sub-folders in the Inbox use the following code:
In the code above we declare a FindFoldersResults object and set it equal to the return value of the FindFolders method on the ExchangeService object. The FindFolders method accepts either aWellKnownFolderName enumeration value or the Id of an existing folder.
Exchange web services allow you not only to create and edit Exchange items but also to leverage its business logic. For example the following code will enable the specified user’s Out of office message:
By setting the State property you either enable or disable the Out of Office notification, setting it to Scheduled and specifying the Duration allow you to schedule the Out of Office notification for a later date. You also have the choice to specify different messages for internal or external addresses as well as which audience to send the response to.
You can not only set the user’s Out of Office status but can also get another user’s Out of Office status by using the following code:
You can also check a users’ availability using the EWS API. In the following example I used theGetUserAvailability method of the ExchangeService object to get an AttendeeAvailability object
There you have it, a crash course in some of the functionality available to you as developer when using Exchange Web services with Office 365. Please see the attached sample project for the code to all the above examples.
Thank you for reading. Until next time, keep coding!
<a href="http://www.add-in-express.com/creating-addins-blog/wp-upload/samples/exchange-online.zip">C# sample project</a>