運作結果:
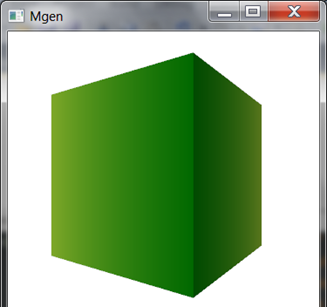
事實上很簡單,定義好一個正方體,處理好紋理。關于MeshGeometry3D的正确定義和紋理這裡就不多講了,可以參考我以前寫過的一些文章:
<a href="http://www.cnblogs.com/mgen/archive/2012/02/22/2363151.html">WPF 3D: MeshGeometry3D紋理坐标的正确定義</a>
<a href="http://www.cnblogs.com/mgen/archive/2012/02/26/2368851.html">WPF 3D:MeshGeometry3D的定義和光照</a>
接下來就是怎樣讓它動起來。我們通過3D點動畫來改變照相機(Camera類型)的位置(Position屬性)進而使正方體動起來(這樣的話實際上正方體沒動,而是照相機在動)。由于正方體是水準旋轉的,那麼Y軸可以忽略,參考下面整個3D圖形的俯視圖,動畫是這樣進行的:

我們的照相機初始時放置在Z軸(0,0,5)的位置,如下圖:
是以旋轉照相機隻需要把Position屬性調整到相應的點就可以,分别是0,0,5 5,0,0 0,0,-5 –5,0,0 ,如下代碼:
<Point3DAnimationUsingKeyFrames Storyboard.TargetProperty="Position"
Storyboard.TargetName="camera">
<LinearPoint3DKeyFrame KeyTime="0:0:1" Value="5
0 0"/>
<LinearPoint3DKeyFrame KeyTime="0:0:2" Value="0
0 -5"/>
<LinearPoint3DKeyFrame KeyTime="0:0:3" Value="-5
<LinearPoint3DKeyFrame KeyTime="0:0:4" Value="0
0 5"/>
</Point3DAnimationUsingKeyFrames>
注意上面使用的是Point3DAnimation類型。接下來需要注意的,我們還需要調整照相機的方向(Camera類型的LookDirection屬性),否則照相機還會保持原方向。這個屬性類型是3D向量,是以需要用Vector3DAnimation類型,調整向量也很簡單,隻需要根據照相機的移動點把方向調整到中心點。
如下代碼:
<Vector3DAnimationUsingKeyFrames Storyboard.TargetProperty="LookDirection"
Storyboard.TargetName="camera">
<LinearVector3DKeyFrame KeyTime="0:0:1" Value="-1
<LinearVector3DKeyFrame KeyTime="0:0:2" Value="0
0 1"/>
<LinearVector3DKeyFrame KeyTime="0:0:3" Value="1
<LinearVector3DKeyFrame KeyTime="0:0:4" Value="0
0 -1"/>
</Vector3DAnimationUsingKeyFrames>
當運作動畫時,你會發現等方塊背面轉過來後,它還保持這暗色,原因是整個光照沒有被旋轉。是以最好把光照再旋轉一下就趨近完美了,在動畫中再調節DirectionalLight的Direction屬性就可以了,這個也是Vector3D類型。
下面是完整的XAML代碼:
<Viewport3D>
<Viewport3D.Triggers>
<EventTrigger RoutedEvent="Loaded">
<BeginStoryboard>
<Storyboard RepeatBehavior="Forever">
<Point3DAnimationUsingKeyFrames Storyboard.TargetProperty="Position"
Storyboard.TargetName="camera">
<LinearPoint3DKeyFrame KeyTime="0:0:1" Value="5
<LinearPoint3DKeyFrame KeyTime="0:0:2" Value="0
<LinearPoint3DKeyFrame KeyTime="0:0:3" Value="-5
<LinearPoint3DKeyFrame KeyTime="0:0:4" Value="0
</Point3DAnimationUsingKeyFrames>
<Vector3DAnimationUsingKeyFrames Storyboard.TargetProperty="LookDirection"
Storyboard.TargetName="camera">
<LinearVector3DKeyFrame KeyTime="0:0:1" Value="-1
<LinearVector3DKeyFrame KeyTime="0:0:2" Value="0
<LinearVector3DKeyFrame KeyTime="0:0:3" Value="1
<LinearVector3DKeyFrame KeyTime="0:0:4" Value="0
</Vector3DAnimationUsingKeyFrames>
<Vector3DAnimationUsingKeyFrames Storyboard.TargetProperty="Direction"
Storyboard.TargetName="light">
</Storyboard>
</BeginStoryboard>
</EventTrigger>
</Viewport3D.Triggers>
<Viewport3D.Camera>
<PerspectiveCamera x:Name="camera" Position="0
0 5" LookDirection="0 0 -1"FieldOfView="60"/>
</Viewport3D.Camera>
<ModelVisual3D>
<ModelVisual3D.Content>
<Model3DGroup>
<DirectionalLight Direction="0
0 -1"
x:Name="light"
Color="White"/>
<GeometryModel3D>
<GeometryModel3D.Geometry>
<MeshGeometry3D Positions="-1
1 1, 1 1 1, -1 -1 1, 1 -1 1, -1 1 -1, 1 1 -1, -1 -1 -1, 1 -1 -1
1 1 1, 1 1 -1, 1 -1 1, 1 -1 -1, -1 1 1, -1 1 -1, -1 -1 1, -1 -1 -1
-1 1 1, -1 1 -1, 1 1 1, 1 1 -1, -1 -1 1, -1 -1 -1, 1 -1 1, 1 -1 -1"
TriangleIndices="0
2 1, 1 2 3, 5 6 4, 5 7 6
8 10 9, 9 10 11, 13 14 12, 13 15 14
16 18 17, 17 18 19, 22 21 20, 22 23 21"
TextureCoordinates="0
0, 1 0, 0 1, 1 1,
0 0, 1 0, 0 1, 1 1,
0 0, 1 0, 0 1, 1 1" />
</GeometryModel3D.Geometry>
<GeometryModel3D.Material>
<DiffuseMaterial>
<DiffuseMaterial.Brush>
<LinearGradientBrush StartPoint="0,0" EndPoint="1,0">
<GradientStop Color="YellowGreen" Offset="0"/>
<GradientStop Color="Green" Offset="1"/>
</LinearGradientBrush>
</DiffuseMaterial.Brush>
</DiffuseMaterial>
</GeometryModel3D.Material>
</GeometryModel3D>
</Model3DGroup>
</ModelVisual3D.Content>
</ModelVisual3D>
</Viewport3D>